Information
vial-qmkprovides several examples of most common microcontroller configurations set up for Vial usage. You can check them out atvial-qmk/keyboards/vial_example.
Porting to Vial
Information
If an already ported firmware exists, there is no need to redo the porting process. Just use the existing one! If your keyboard has a keymap folder named ‘vial’ it is already ported!
vial-qmk/keyboards/
The second part of this tutorial will guide you through porting your keyboard to Vial. It assumes you will be adapting source code that was written for and known to work with a recent version of QMK. Keyboard designers are strongly suggested to create a default QMK keymap first to familiarize themselves with the firmware creation process and correct any errors.
If you only have precompiled firmware, you will need to obtain the source code for it before proceeding. You have the right to ask the maker of your keyboard for this. Reverse-engineering hardware or software is beyond the scope of this guide.
Information
Compiling Vial firmware requires some basic knowledge of how to use a command line environment—a bit more than just
qmk compile. If you are unfamiliar with commands such ascdandpwd, please read through this basic primer to learn the commands you’ll need to know.
1. Prepare Your Build Environment
Important
You will need a QMK environment in order to build firmware for Vial. This is not the same thing as QMK Toolbox. If you do not have this, you must first follow QMK’s guide here. Existing QMK environments may need to be updated, but there is no need to uninstall or remove anything. You can simply move to the appropriate folder when compiling firmware for QMK or Vial-QMK.
Step by step guide:
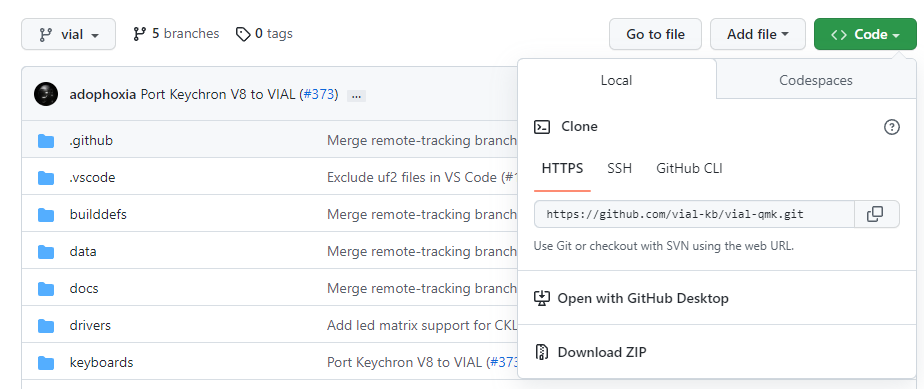
- Clone the latest version of the repository from https://github.com/vial-kb/vial-qmk into a new folder. This folder should be located outside of any existing QMK repository folders. Nesting
vial-qmkinsideqmk_firmwarewill cause issues, avoid this!- If you are unfamiliar with git, and want a GUI version, install the GitHub Desktop version for your OS. Go to https://github.com/vial-kb/vial-qmk and select “Open in Github Desktop”. Follow the guided download/cloning.
- Reference Guide: Run
git clone https://github.com/vial-kb/vial-qmk.
- Install the prerequisites for compilation.
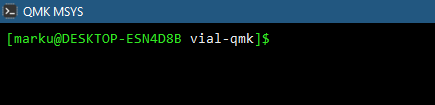
- Open the QMK command line environment and navigate to your new
vial-qmkfolder to run the above command. Refer to this guide on how-to. In the image below, notice how it says ‘vial-qmk’ at the end of the prompt. This is your confirmation you have found the correct directory.
- Reference Guide: Run
make git-submodulein your newvial-qmkdirectory to clone the git submodules.
- Open the QMK command line environment and navigate to your new
- Verify that your installation is complete by running
qmk doctor.- If you have added a new keyboard folder as part of your port, you will see
Git has unstashed/uncommitted changes.Other than that, the only warning should beThe official repository does not seem to be configured as git remote "upstream".(This is fine because Vial-QMK is not the official QMK repository.)
- If you have added a new keyboard folder as part of your port, you will see
- Test your Vial-QMK installation by compiling the
defaultkeymap for your keyboard.- Run
make path/to/your/keyboard:default. Note that the path does not include the foldervial-qmk/keyboards/nor does it have a leading slash. It should start with the name of the keyboard or designer, e.g.make vial_example/vial_atmega32u4:defaultIf thedefaultkeyboard doesn’t build, nothing based on it will either! Code copy-and-pasted in from other repositories may need to be modified based on the version of QMK it was created for.
- Run
Note
Running
makeis not quite the same as runningqmk compile. Runningqmk compilein the wrong directory will default to compiling QMK firmware, not Vial firmware. To avoid any potential confusion, usemake.
2. Create a new vial keymap
Copy the existing keymaps/default folder to keymaps/vial with the content intact. Leave the keymaps/default folder in place; do not modify or remove it.
Important
When porting to Vial, the resulting keymap should ALWAYS be named
vialand nothing else! This avoids any confusion about if the keyboard has already been ported or not.
3. Enable Vial in your rules file
Create a new file (or edit an existing one) under [keyboard_name]/keymaps/vial/rules.mk with the following contents:(example)
VIA_ENABLE = yes
VIAL_ENABLE = yes
Important
Both of these rules are required to be in the keymap
rules.mk. Do not removeVIA_ENABLE.
Important
Do NOT include either
VIA_ENABLEorVIAL_ENABLEon a keyboard levelrules.mk, the structure in layers allows the code in thekeyboardsfolder to be backwards compatible with QMK.
4. Move JSON so Vial can find it
Place your keyboard definition JSON (either one made in step 1 of this tutorial or downloaded from the VIA keyboards repository) under [keyboard_name]/keymaps/vial/vial.json so that Vial build process can find it. (example)
Important
This file must be named
vial.json. It cannot have any other name.The Vial keyboard definition (
vial.json) is not the same as aninfo.jsonfile. You cannot copy aninfo.jsonfile to use as thevial.json.
5. Generate and add unique keyboard ID
The ID generated is unique for the firmware to a keyboard type and model; it does not need to be unique for each individual keyboard or firmware compiled.
From the root of vial-qmk, run python3 util/vial_generate_keyboard_uid.py in order to generate a unique Vial keyboard ID:
python3 util/vial_generate_keyboard_uid.py
#define VIAL_KEYBOARD_UID {0xXX, 0xXX, 0xXX, 0xXX, 0xXX, 0xXX, 0xXX, 0xXX}
Create a new file under [keyboard_name]/keymaps/vial/config.h and add the following contents to it:
/* SPDX-License-Identifier: GPL-2.0-or-later */

#pragma once

#define VIAL_KEYBOARD_UID {0xXX, 0xXX, 0xXX, 0xXX, 0xXX, 0xXX, 0xXX, 0xXX}
The last line should match what you got in the previous step. (example)
6. Set up a secure unlock combination
Vial needs a key combination in order to protect the user from a malicious host computer unknowingly changing security-sensitive settings, such as flashing a malicious firmware; for more information see here.
If you do not want to utilize this feature, you should set VIAL_INSECURE = yes in your keymaps/vial/rules.mk. While you can distribute the resulting firmware to your users and will not lose any Vial functionality, note that keyboards which enable VIAL_INSECURE will not be accepted to the main vial-qmk repository.
For keyboards that do not define VIAL_INSECURE, proceed to configure VIAL_UNLOCK_COMBO_ROWS and VIAL_UNLOCK_COMBO_COLS definitions:
- You should configure a combo of at least 2 keys
- Suppose this is your KLE and you want to configure a combo of Escape+Enter:

- The Escape key is located at [0, 0] and the Enter key is at [2, 13]
- So you should set in your
keymaps/vial/config.hright below theVIAL_KEYBOARD_UIDline (example):#define VIAL_UNLOCK_COMBO_ROWS { 0, 2 }#define VIAL_UNLOCK_COMBO_COLS { 0, 13 }
- Note that this feature works with multi-layout keyboards, however you should make sure that the keys you pick appear in every possible layout:
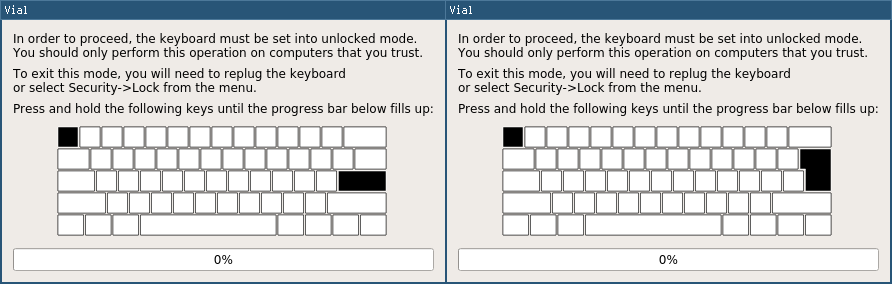
After you flash the firmware, check that the function works correctly by activating the “Security→Unlock” menu.
7. Compile Vial firmware for your keyboard
Compiling and flashing can be done in the same way as QMK. For example, to compile a vial keymap for a keyboard located under keyboards/xyz/xyz60, run make xyz/xyz60:vial from the root vial-qmk directory. If at this point you’re having issues making the firmware fit (running out of flash, RAM or EEPROM), see this guide for how to reduce Vial firmware size.
Done!
You now should be able to compile the firmware, flash it, and have your keyboard auto-detected by Vial.
Did you run into a problem? You can get porting support by joining Vial discord.